nopCommerce
nopCommerce is an open-source e‑commerce platform built on the .NET Core framework.
It provides a complete foundation for online stores, offering catalog management, order processing, and payment integration. Its plugin‑based ecosystem enables merchants to extend functionality and scale the platform to their specific needs.
Paybyrd provides a dedicated nopCommerce plugin that embeds its payment methods directly into the checkout experience. After a simple installation and configuration process, merchants can enable secure payment flows driven by Paybyrd.
How to install
Requirements
Before installing Paybyrd’s nopCommerce plugin, make sure you meet these requirements:
- nopCommerce is already installed and configured with a production or staging environment.
- You have a Paybyrd account with Test and Live API keys.
- Your store has a public domain available. Order status updates in nopCommerce work through async webhook calls, which require a publicly exposed URL.
Downloading the plugin
You have 2 ways to download the plugin:
- via the nopCommerce marketplace:
- Visit the plugin’s marketplace page
- Select Get Extension.
- via your store’s Configuration page:
- Open the nopCommerce Admin Dashboard
- Navigate to Configuration → Local Plugins
- Search for Paybyrd, and click on Download
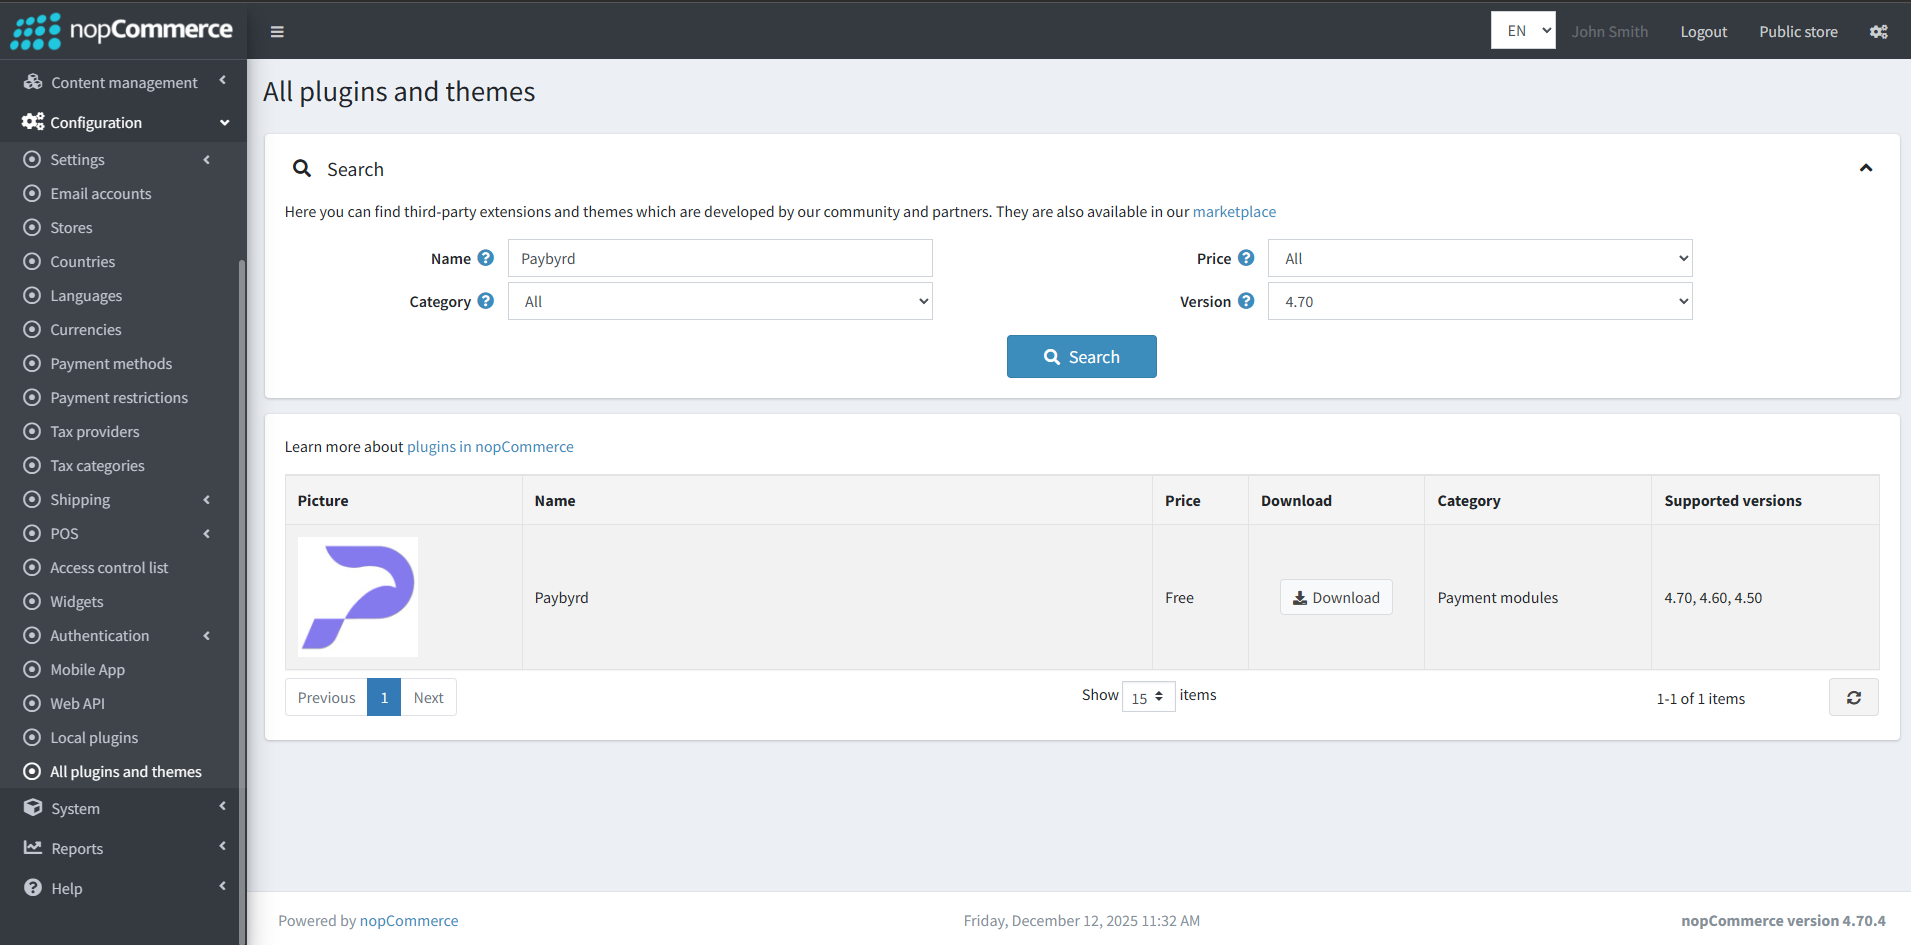
Downloading the nopCommerce plugin
Both methods enable you to download the Paybyrd plugin as a ZIP archive.
Installing the plugin
To install the plugin you downloaded:
- Open the nopCommerce Admin Dashboard
- Navigate to Configuration → Local Plugins
- Select Upload plugin or theme, then upload the ZIP archive
- Select Reload list of plugins, then find the Paybyrd plugin on the page
- Click Install, then activate the plugin to make it available as a payment method

Installing the Paybyrd nopCommerce plugin
Visit the nopCommerce documentation for more details about installing plugins.
How to configure
To configure the nopCommerce plugin:
- open the Admin Dashboard and navigate to Configuration → Payment methods
- Select Paybyrd and click on Configure
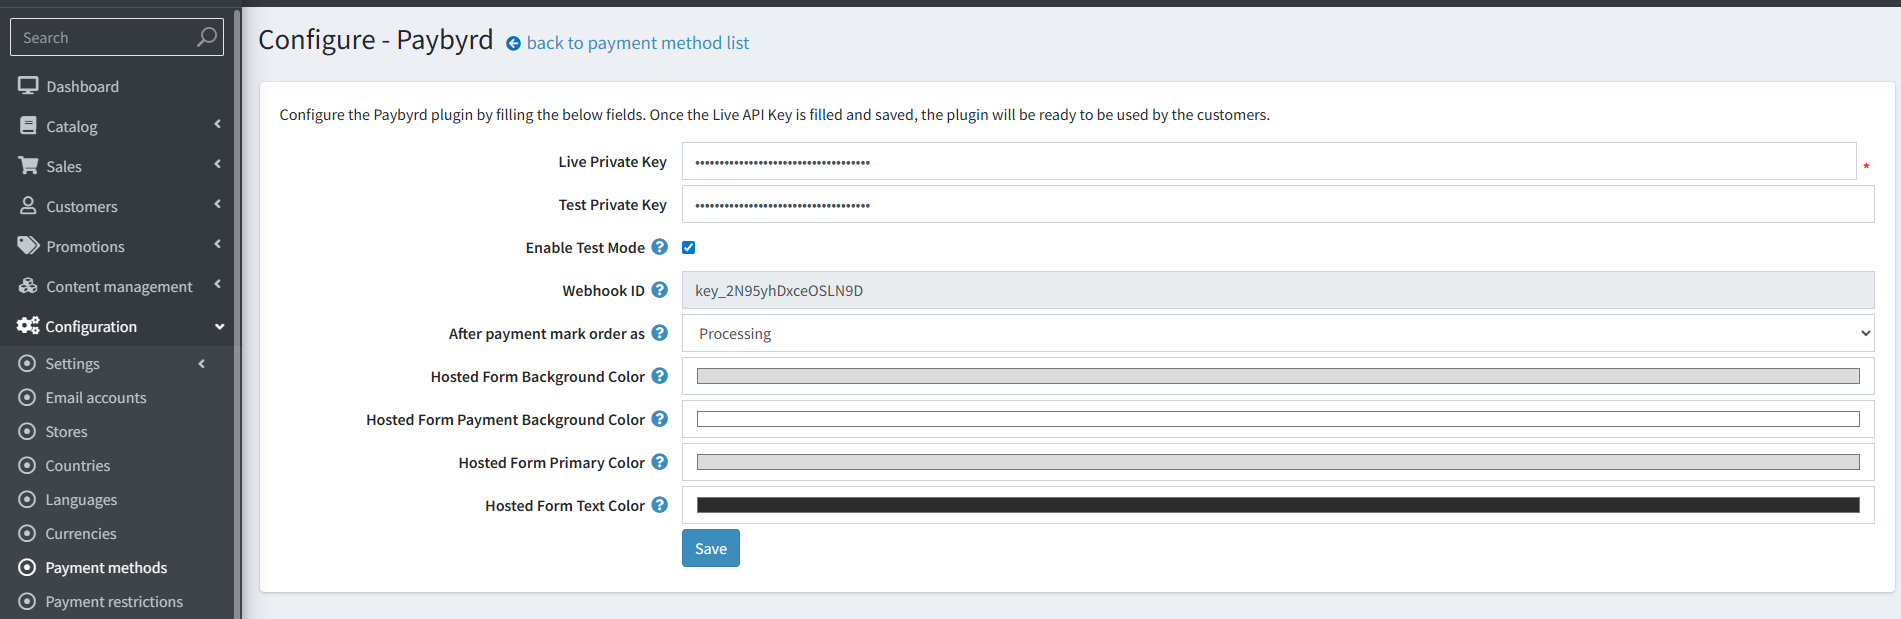
Configuring the Paybyrd nopCommerce plugin
You can configure these aspects:
- Live Private Key is required for production transactions.
- Test Private Key identifies you in Paybyrd’s sandbox and enables testing.
- Test Mode toggles the use of Paybyrd’s testing environment. When enabled, all payments are executed with the Test Private Key.
- Webhook ID is automatically generated after saving your API keys. nopCommerce uses these IDs to receive asynchronous updates when Paybyrd finalizes a transaction.
- Order status setting lets you define how the order status is set after the order is paid via the gateway. The available options are:
- Processing
- Completed
Select Processing if you have more steps in your workflow before finishing the order fulfullment process, for example shipping.
- Color settings enable you to set up the Paybyrd plugin to fit your store’s branding through configuring background and font colors.
To edit the name or the displayed order of the Paybyrd payment method, navigate to Configuration → Payment methods, select Paybyrd and click on Edit.
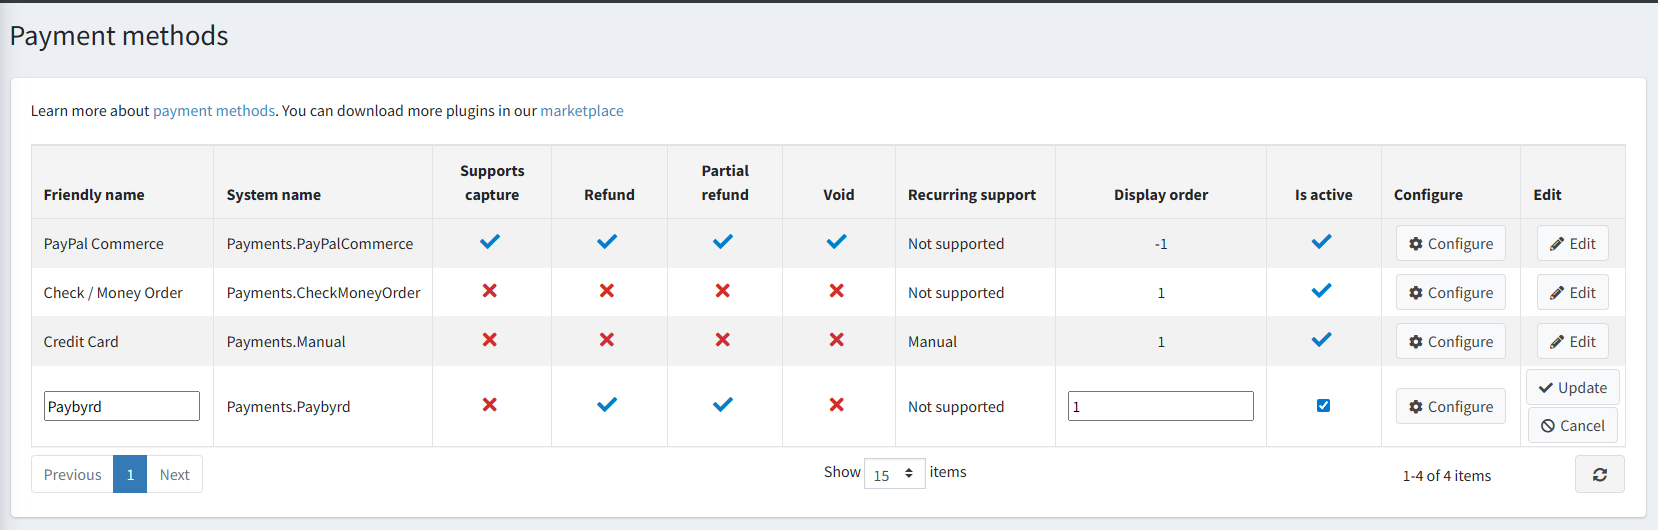
Editing name and display order
- Title: controls how the payment option appears at checkout
- Display order: defines the order of payment methods displayed to the user.
-1forces an item to take the first place.1tonthen controls the order of the remaining payment methods.
Understand the payment flow
When using Paybyrd’s plugin, the end user goes through this payment flow:
- User selects the Paybyrd payment method during checkout.
- Paybyrd creates an order through the plugin, using the API keys added during plugin configuration.
- nopCommerce loads the Paybyrd payment gateway for the user.
- User selects a payment method, fills all required fields, and submits the payment request
- Paybyrd processes the payment request using the selected payment method, for example card. In this case, a payment request is made with the card token, card holder name, expiration date, and any other custom or required field.
- This payment request generates a transaction for the order.
- Once this transaction is fulfilled, Paybyrd triggers asynchronous webhooks to the merchant’s domain.
- nopCommerce updates the order state to Processing or Completed, according to the configuration.
Order synchronization depends on implementing webhooks correctly.
Make sure that your store has a publicly exposed URL to properly receive the webhook notifications from Paybyrd.
Refunds
You can initiate refunds from the nopCommerce order management page once the plugin is active.
Navigate to the Orders page in the Admin Dashboard and select the order you need to refund.
- Full refunds return the entire captured amount.
- Partial refunds submit an adjusted value to Paybyrd.
Order status changes only when webhook callbacks confirm that a refund is complete.
Without webhook access, nopCommerce does not reflect the updated state.
Going live
Follow these steps when going live with your store:
- Open the nopCommerce Admin Dashboard and navigate to Configuration → Payment methods.
- Select Paybyrd and click on Configure
- Add your Live Private Key to enable production API calls
- Disable the Enable Test Mode checkbox
- Save changes and confirm that Live Webhook IDs are generated
- Execute a real payment to verify production readiness
Limitations
The Paybyrd plugin in nopCommerce currently contains these limitations:
- Custom checkout themes used in nopCommerce may block the payment gateway from rendering for the user.
- Paybyrd requires a publicly exposed URL to send webhook notifications to. Order synchronization in nopCommerce depends on implementing webhooks correctly: payments done in offline or local instances cannot update the order state.